
In this post, you’ll learn how to set up and configure all the necessary components to enable Snowflake’s Snowpipe for automated and reliable data ingestion using Azure. We’ll walk through how to configure Azure Blob Storage, set up Event Grid, and integrate everything step by step to allow Snowflake to seamlessly ingest data from your Azure cloud storage.
Contents
Architecture Overview
The diagram below outlines the core components that make up the planned architecture for implementing Snowpipe. The main components involved are the following:
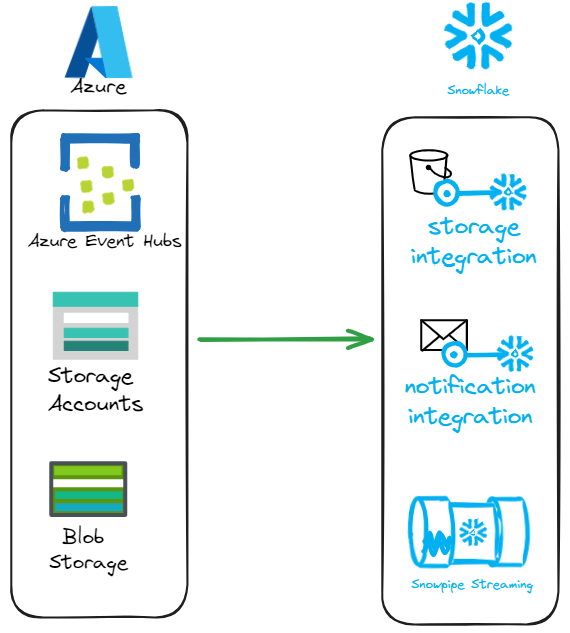
Here is a quick summary of what the function is associated with each component
Component | Description |
Azure Blob Storage | Stores incoming data files to be ingested into Snowflake. |
Storage Queue | Temporarily holds event messages triggered by new blob uploads. |
Event Grid | Forwards blob creation events to the storage queue for processing. |
Storage Integration | Securely connects Snowflake to Azure Blob Storage using scoped credentials. |
Notification Integration | Allows Snowflake to listen for and process events from the storage queue. |
External Stage | Defines the location and access method to external data in Azure Blob Storage. |
Snowpipe | Continuously loads new data from the external stage into a Snowflake table. |
The data workflow for the solution consists of the components’ interaction:

Configure Azure Blob Storage and Snowflake Components
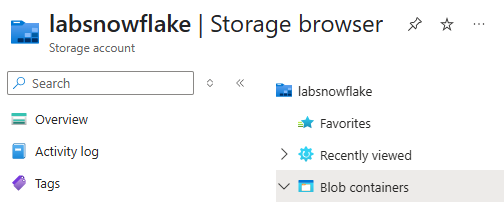
We’ll begin by configuring the basic components at the level of our Azure Blob Storage Account. The first step is to create a new container within your Blob Storage Account. To do this, navigate to Storage Account <<labsnowflake>>
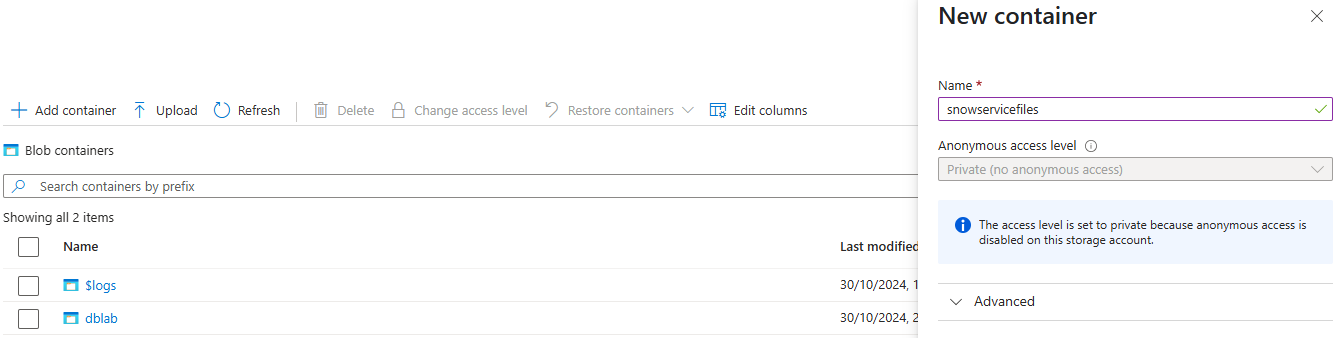
Click on the Blob container and the + Add container button, we are going to name it as snowservicefiles
Once defined, we will upload three Customers files in JSON format for testing.

Creating a Storage Integration
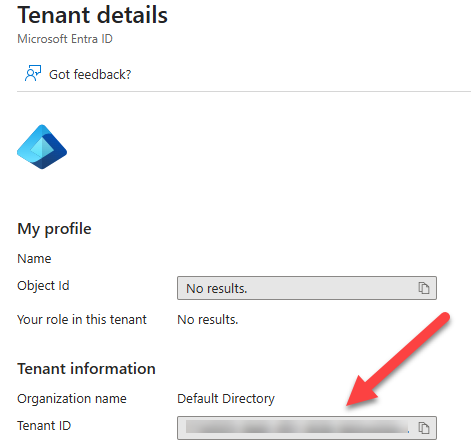
The combined process for creating the Storage Integration requires the support of your Azure Administrator. You must take the details related to Azure Tenant ID, storage account name and the name of the storage container.
To get the Azure Tenant ID you could search in Azure for Microsoft Entra and go to the Administration details of your account, where you will find the Tenant ID
“At this stage, the next step is to log in to Snowflake using the ACCOUNTADMIN role, which has the necessary privileges to create a new storage integration. Below is the reference code you can use—we’ll name this storage integration as follows: AZURE_SNOW_INTEGRATION.
|
1 2 3 4 5 6 7 8 9 10 |
--Definition of Storage Integration requires to have ACCOUNTADMIN role USE ROLE ACCOUNTADMIN; CREATE STORAGE INTEGRATION AZURE_SNOW_INTEGRATION TYPE = EXTERNAL_STAGE STORAGE_PROVIDER = 'AZURE' ENABLED = TRUE AZURE_TENANT_ID = 'WRITE-TENANT-ID-HERE' STORAGE_ALLOWED_LOCATIONS = ('azure://labsnowflake.blob.core.windows.net/snowservicefiles/'); |
At this point, we’ve defined the storage integration object, but there are two critical pieces of information we still need: the Azure consent URL -which must be shared with your Azure administrator- and the value of the Azure multi-tenant application name. For detailed guidance on how to retrieve and use these values, I recommend referring to my previous article. Here’s the link: http://bit.ly/4kiYK7E
The following code grants the required privileges to the SYSADMIN role. It also creates a dedicated schema for testing purposes and defines an external stage that connects to the previously configured storage integration.
|
1 2 3 4 5 6 7 8 9 10 11 12 13 |
--Has to Grant ROLE to SYSADMIN as part of a good practice GRANT USAGE ON INTEGRATION AZURE_SNOW_INTEGRATION TO ROLE SYSADMIN; --Creating an external Stage USE ROLE SYSADMIN; CREATE SCHEMA MASTER_DATA; USE SCHEMA MASTER_DATA; CREATE STAGE MASTER_DATA_STAGE STORAGE_INTEGRATION = AZURE_SNOW_INTEGRATION URL = 'azure://labsnowflake.blob.core.windows.net/snowservicefiles/' FILE_FORMAT = (TYPE = JSON); |
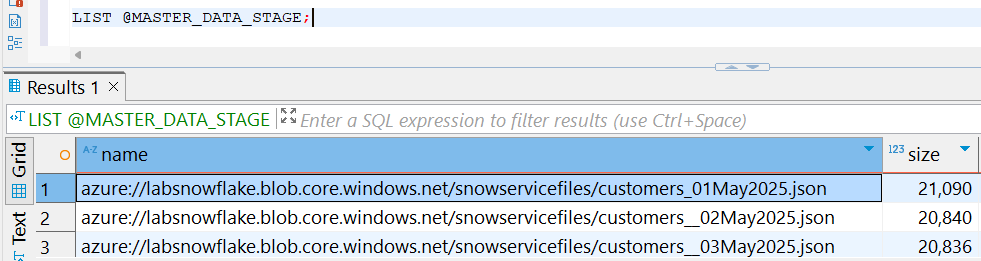
The proper way to test that everything is working as expected consists of using the LIST command, which would return the JSON files previously uploaded into the Azure Blob storage container, as you can see in this screen:
At this stage, we’ve configured the components shown clearly in the image below. The blurred elements represent components that are yet to be set up.

Configuring cloud messaging and Snowpipe
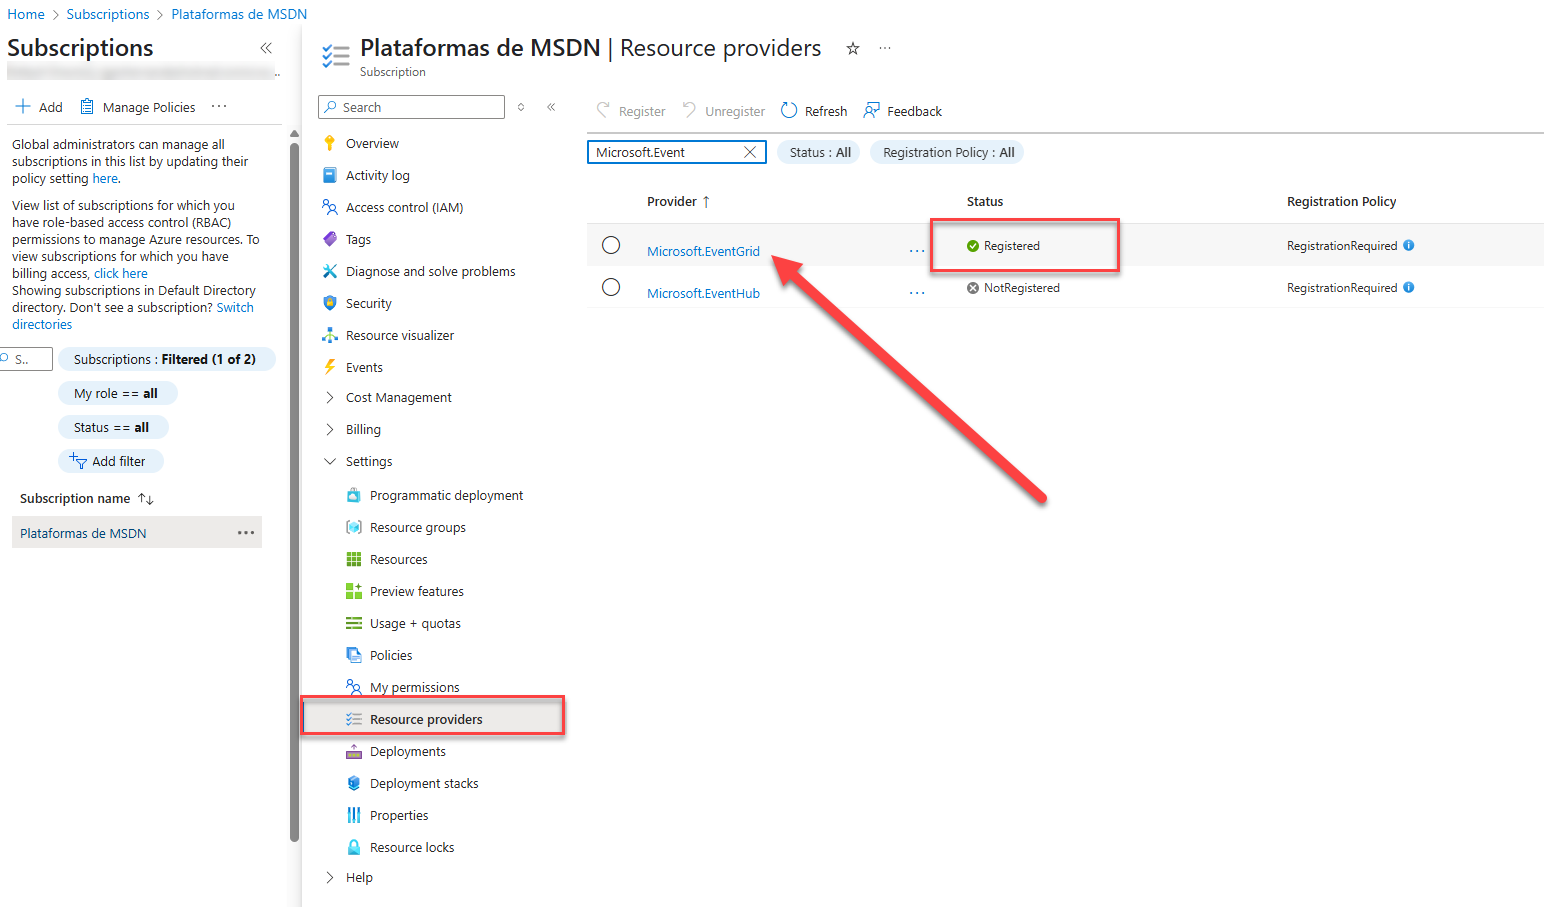
We need to establish a mechanism to notify Snowpipe when new files arrive in the configured Storage Container. In the Azure ecosystem, we have the Event Grid feature, defined in this article. First of all, you have to verify that it is enabled. You could navigate to your subscription and choose the Resource providers option and find <<Microsoft.EventGrid>>, if it is registered, you do not need to do anything, otherwise, you must register it.
Defining the Storage Queue
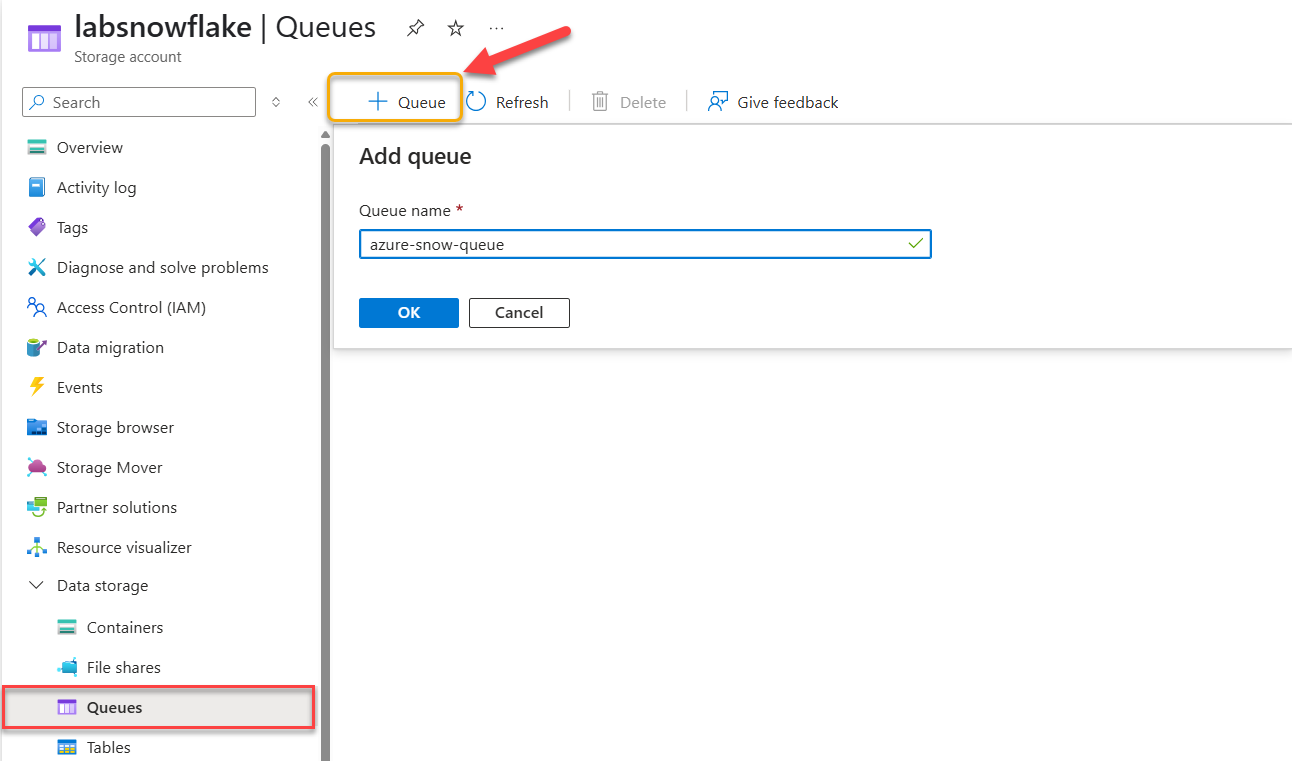
The primary purpose of defining the Storage Queue is to store messages delivered by Event Grid. You should go to your Storage Account and select the Queue option, and define a new one. For this post, we are going to name it: azure-snow-queue. See the following image as a reference:
Once you have created it, go to the queue and note the URL for later use.

Defining the Event Grid Subscription
Defining an Event Grid Subscription allows you to specify which events Event Grid should monitor and respond to. Think of it like subscribing to an RSS feed—it continuously watches the topics or sources you’ve selected and delivers updates when relevant events occur.
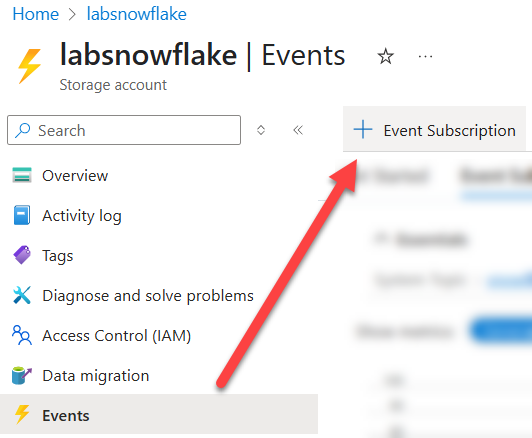
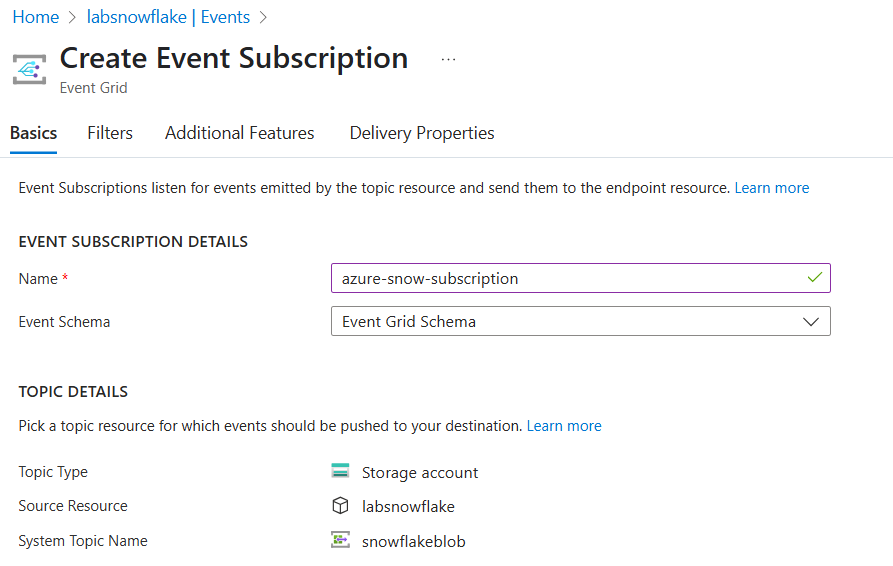
Within the Storage Account, go to the Events section and select Create a new Event Subscription. In this setup, uploading a file triggers a ‘Blob Created’ event. Azure Storage publishes this event to Event Grid, which then routes it to the Storage Queue. In our case, we are going to name it azure-snow-subscription, see the following image as a reference:
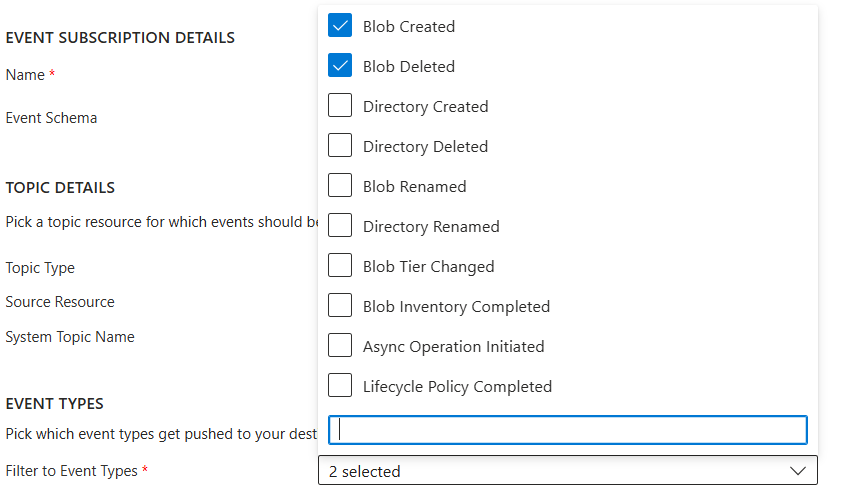
We are going to define two Event Types
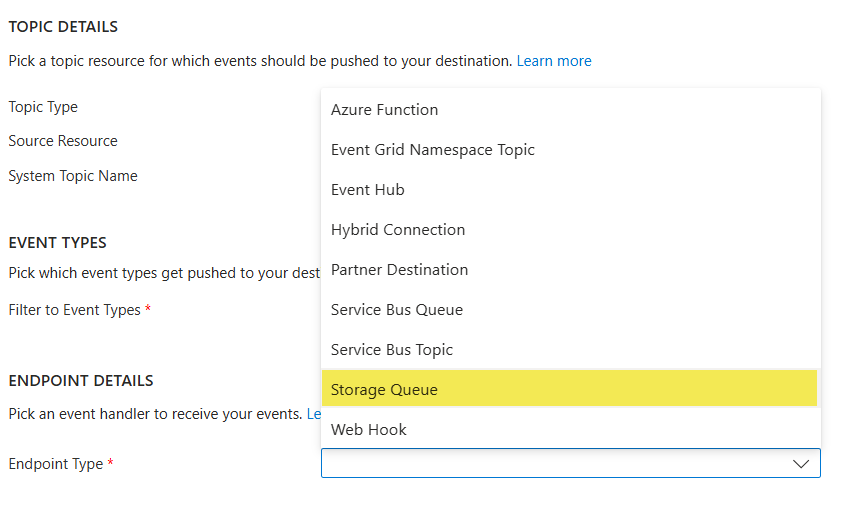
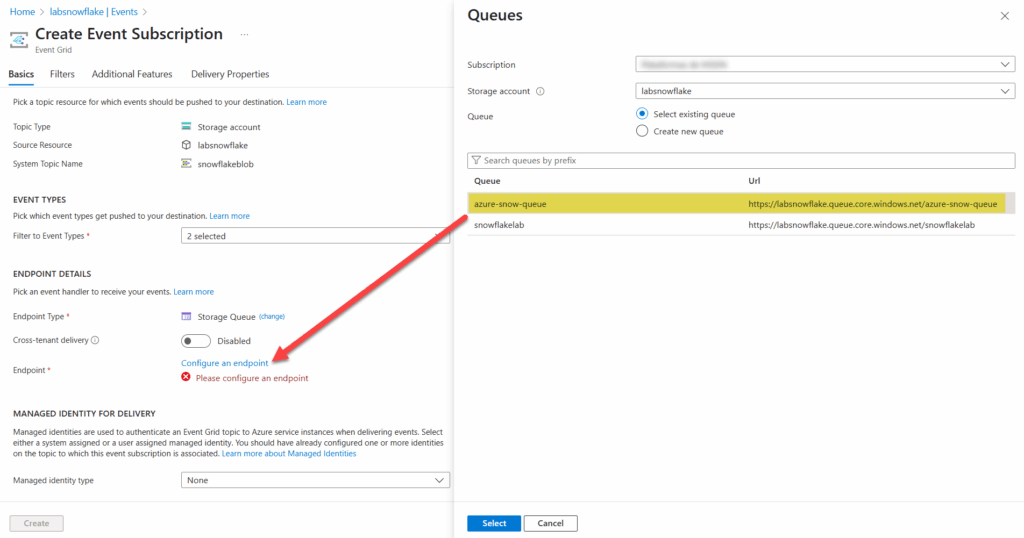
Finally, in the Endpoint Type, you must choose Storage Queue, because it is the final destination where we want Event Grid to forward the events.
Finally, you have to configure an endpoint, in our case, it is the Queue that we have defined for this purpose, which we named azure-snow-queue. Here the screen:
Defining the notification integration
“At this stage, we’ve created all the necessary Azure components to get our pipeline up and running. As mentioned earlier, keeping a record of the configurations and names you’ve defined in Azure is important to ensure smoother and more secure progress in the upcoming steps.
Let’s move into the Snowflake environment and start creating a new Notification Integration. In this case, you could use the following source code as a reference.
|
1 2 3 4 5 6 7 8 9 10 11 12 13 14 |
-- Creating a new Notification Integration -- As in the past with other components as Storage Integration -- It is mandatory to use AccountAdmin Role CREATE NOTIFICATION INTEGRATION AZURE_SNOW_QUEUE_INTEGRATION ENABLED = TRUE TYPE = QUEUE NOTIFICATION_PROVIDER = AZURE_STORAGE_QUEUE AZURE_STORAGE_QUEUE_PRIMARY_URI = 'https://labsnowflake.queue.core.windows.net/azure-snow-queue' AZURE_TENANT_ID = 'YOUR_TENANT_ID_HERE'; -- Use Describe command for getting the Azure Consent URL and the Multi Tenant App Name DESCRIBE NOTIFICATION INTEGRATION AZURE_SNOW_QUEUE_INTEGRATION; |
Just like we did in the Storage Integration section, you’ll need to request authorisation from the Azure Administrator. Specifically, the Storage Queue Data Contributor role must be assigned. Once this step is completed, grant the necessary usage privileges for this component to the SYSADMIN role in Snowflake.
|
1 |
GRANT USAGE ON INTEGRATION AZURE_SNOW_QUEUE_INTEGRATION; |
At this point, we have covered all the components which were part of the initial data workload.
Testing the involved components
This final section of the post focuses on validating the full integration workflow. To properly test the end-to-end functionality, we’ll create a new table in Snowflake that will be populated automatically by the Snowpipe component.
The JSON File format, which I have uploaded into the Azure Blob Storage Container, has this format:
|
1 2 3 4 5 6 7 |
{"customer_id": "8c17476c-5c62-491d-80c1-3e709a211db0", "first_name": "Kristy", "last_name": "Thomas", "email": "lbarron@french-wright.com", "phone": "(025)873-0934x83921", "address": {"street": "50671 Misty Harbors Apt. 024", "city": "Williamsberg", "state": "Arkansas", "postal_code": "55851", "country": "Netherlands"}, "created_at": "2016-07-17T13:33:48"} {"customer_id": "099998ae-4f94-48d0-b71d-38693b0c46f8", "first_name": "Joshua", "last_name": "Booker", "email": "kelly09@gmail.com", "phone": "001-409-772-3173", "address": {"street": "156 Brittany Fort", "city": "Port Cole", "state": "Florida", "postal_code": "37138", "country": "French Polynesia"}, "created_at": "2018-04-16T09:49:05"} {"customer_id": "9798bc18-49b8-4af0-9ecb-a3c6e656b842", "first_name": "Robert", "last_name": "Matthews", "email": "sburke@berry.com", "phone": "+1-234-641-2435x016", "address": {"street": "42746 Lee Groves Apt. 272", "city": "Birdmouth", "state": "Georgia", "postal_code": "57479", "country": "Dominican Republic"}, "created_at": "2016-02-18T16:17:08"} {"customer_id": "7ddb7060-06ba-4947-9595-ae0d0c0796d3", "first_name": "Ann", "last_name": "Mills", "email": "mwilson@hotmail.com", "phone": "+1-572-516-9290x930", "address": {"street": "986 Deanna Trafficway Apt. 434", "city": "Barkershire", "state": "Nebraska", "postal_code": "46441", "country": "Saudi Arabia"}, "created_at": "2019-05-03T18:57:46"} {"customer_id": "d4c35dee-d9ab-405f-9020-23d1bf34395d", "first_name": "Michelle", "last_name": "Jones", "email": "irogers@gmail.com", "phone": "438.717.5676x57107", "address": {"street": "344 Bush Tunnel", "city": "Christinehaven", "state": "Georgia", "postal_code": "54414", "country": "Reunion"}, "created_at": "2025-04-09T18:40:48"} {"customer_id": "fb8dc1fc-9912-423f-a397-9e97a2bc3b4a", "first_name": "Erika", "last_name": "Michael", "email": "whitneymolina@hotmail.com", "phone": "692-537-5752x64826", "address": {"street": "787 Harrison Passage Apt. 565", "city": "New Jeffreyfort", "state": "Wisconsin", "postal_code": "20927", "country": "China"}, "created_at": "2019-02-05T21:08:56"} {"customer_id": "aca385b8-8006-493e-9d3d-8a48f9cef04d", "first_name": "Sean", "last_name": "Oneal", "email": "thompsonfranklin@hotmail.com", "phone": "735.323.1109", "address": {"street": "80589 Hernandez Passage", "city": "East Brent", "state": "Washington", "postal_code": "50121", "country": "Cambodia"}, "created_at": "2024-02-27T01:51:22"} |
Below is the SQL code to define a new CUSTOMERS_CLEANUP table, structured to match the JSON data previously uploaded to the SnowServiceFiles container.
|
1 2 3 4 5 6 7 8 9 10 11 12 13 |
CREATE OR REPLACE TABLE customers_cleanup ( customer_id STRING, first_name STRING, last_name STRING, email STRING, phone STRING, address_street STRING, address_city STRING, address_state STRING, address_postal_code STRING, address_country STRING, created_at TIMESTAMP_NTZ ); |
The following statement creates a new Snowpipe object, designed to seamlessly integrate with the pipeline components we’ve configured earlier in this guide.
|
1 2 3 4 5 6 7 8 9 10 11 12 13 14 15 16 17 18 19 20 21 |
CREATE OR REPLACE PIPE AZURE_SNOW_PIPE AUTO_INGEST = TRUE INTEGRATION = 'AZURE_SNOW_QUEUE_INTEGRATION' AS COPY INTO customers_cleanup FROM ( SELECT $1:customer_id::STRING AS customer_id, $1:first_name::STRING AS first_name, $1:last_name::STRING AS last_name, $1:email::STRING AS email, $1:phone::STRING AS phone, $1:address.street::STRING AS address_street, $1:address.city::STRING AS address_city, $1:address.state::STRING AS address_state, $1:address.postal_code::STRING AS address_postal_code, $1:address.country::STRING AS address_country, $1:created_at::TIMESTAMP_NTZ AS created_at FROM @MASTER_DATA_STAGE ) FILE_FORMAT = (TYPE = 'JSON'); |
It is important to note that to consume our existing JSON files, we need to update the pipeline using the Refresh command. This will automatically trigger the ingestion of the current JSON files into the Container.
|
1 |
ALTER PIPE AZURE_SNOW_PIPE REFRESH; |
If we wait for some seconds and execute a SELECT statement, we are going to see how the data is loaded from our JSON files.
|
1 |
SELECT * FROM CUSTOMERS_CLEANUP; |

Conclusion
This guide demonstrated how to configure Azure Blob Storage, Event Grid, and Snowflake Snowpipe to enable automated and reliable data ingestion. The setup allowed Snowflake to seamlessly ingest data from Azure, streamlining the data workflow effectively.