
This article offers a comprehensive, step-by-step guide for integrating Azure Blob Storage with a Snowflake account hosted on AWS using storage integration. It covers key topics such as setting up permissions, creating storage integration, and configuring an external stage for efficient data loading and unloading. Through practical examples, you’ll learn how to seamlessly connect Snowflake and Azure, ensuring secure data transfers and leveraging Snowflake’s staging functionality to streamline data management across cloud platforms. This guide is designed to simplify the process and enhance the efficiency of cross-cloud data operations.
Contents
Initial configuration
In this post, I will not go into details on how to configure Azure Blob Storage; I recommend this article. In my case, I defined a Container and some folders/files for this article as this:

Inside, I have defined three different folders with CSV files and GSV compression-type for use in the coming articles where I will continue exploring Data Engineering tasks in Snowflake. Let us follow with the first step for creating a new Database.
Note: Remember to use the ACCOUNTADMIN role for the next actions, basically it is the right role for defining the objects required.
|
1 2 3 |
CREATE OR REPLACE DATABASE SNOWPRO_COURSE; USE DATABASE SNOWPRO_COURSE; |
It is important to highlight that the following steps are a combination of actions into Azure and Snowflake, in case you need to reinforce them, I recommend reading this article.
Configuring Storage Integration
A Storage Integration simplifies the interaction between Snowflake and external cloud storage services (Azure, Amazon, GCP) by securely storing storage metadata. This setup allows seamless data exchange without requiring users to provide credentials during stage creation or data loading processes.
The integration retains key details like the storage provider, Azure tenant ID, and the blob storage location. Permissions for accessing these storage locations are granted by the cloud provider administrators to the automatically generated service principal. This method enhances security by eliminating the need for direct credential management.
The following code snippet shows you the storage integration structure:
|
1 2 3 4 5 6 |
CREATE STORAGE INTEGRATION <put_integration_name_here> TYPE = EXTERNAL_STAGE STORAGE_PROVIDER = AZURE ENABLED = TRUE AZURE_TENANT_ID = '<put_tenant_id>' STORAGE_ALLOWED_LOCATIONS =('azure://<account>.blob.core.windows.net/') |
To retrieve the tenant_id and storage account details, you’ll need to request them from your Azure Administrator. However, we’ll also guide you through the steps to locate this information on your own.
Getting Storage account details
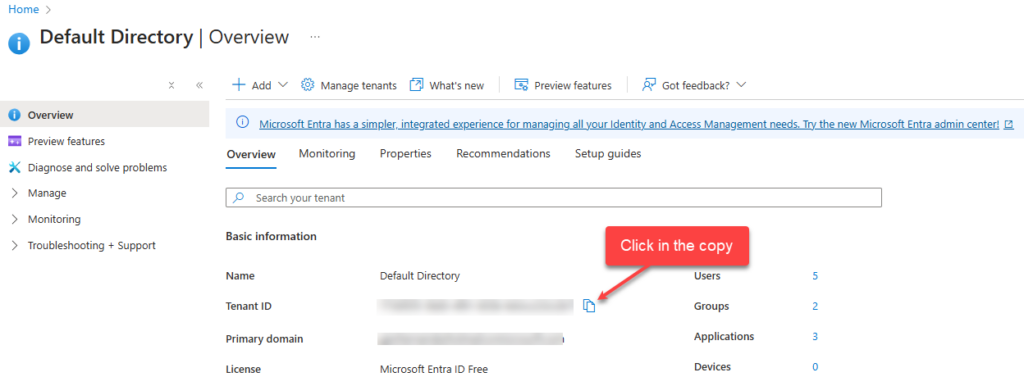
For getting the tenant_id, you have different ways to get it. The first is simply go to the search bar and type Microsoft Entra ID, and once in there, go to Tenant ID and copy it.
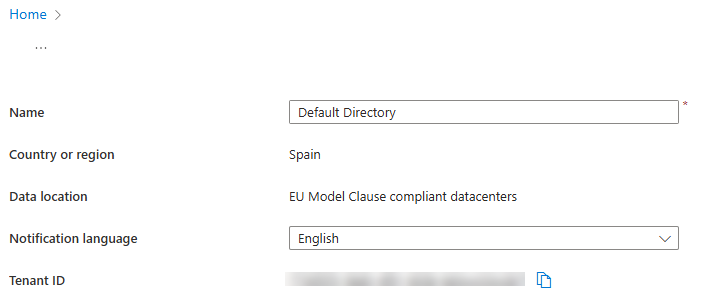
The other option is to type in the search bar Tenant Properties and copy the Tenant Id and copy it.
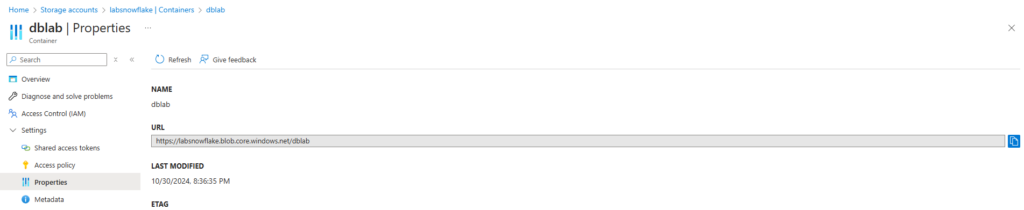
To find the Storage Location, it is recommended to follow the next path:
Storage Accounts ==> Storage Account Name ==> Data Storage ==> Containers ==> Container Name ==> Setting ==> Properties
Applying the Storage Integration configuration (Grants)
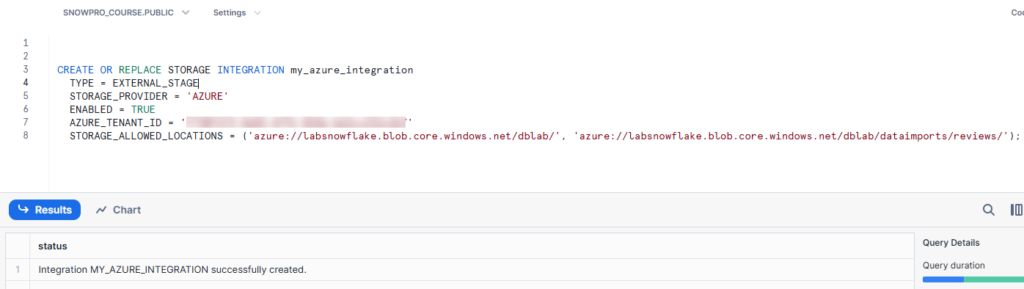
At this point, we are ready to create the new Storage Integration, remember that is mandatory to use an elevated account role (AccountAdmin), here is the example:
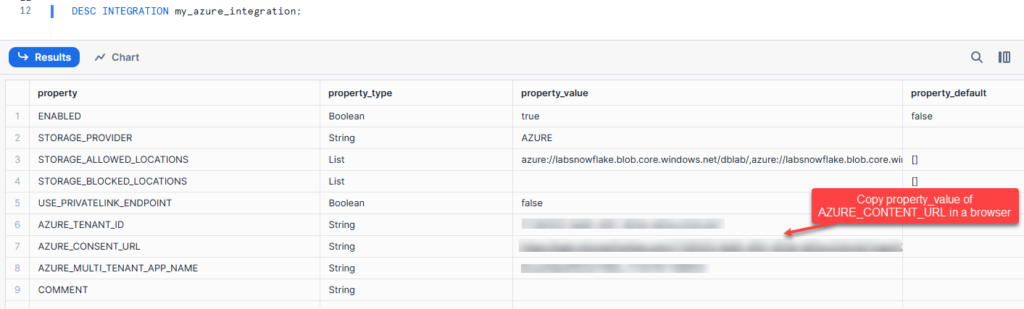
At this point, we are ready to start the process of granting Snowflake access. First of all, write the command DESC INTEGRATION <Storage Integration Name> . Once you get the output, copy and paste in a browser the AZURE_CONSENT_URL value.
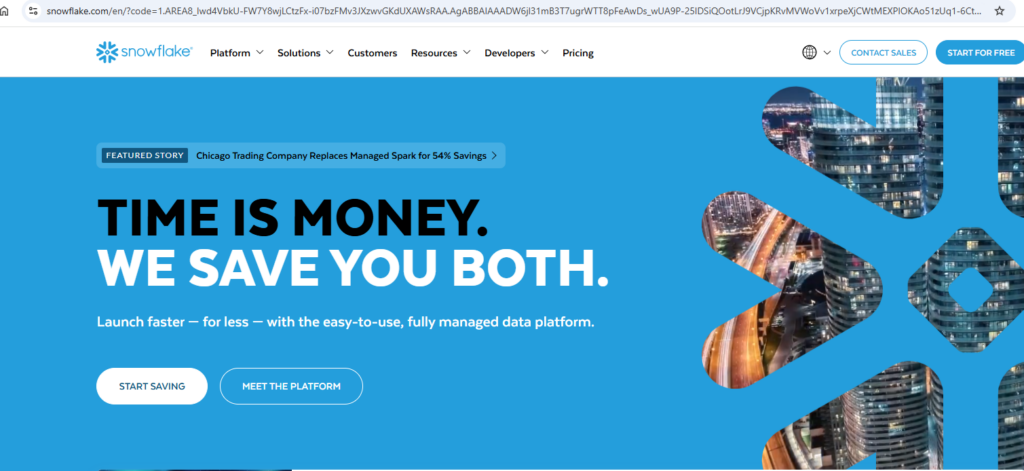
It redirects you to Azure Windows, and after you accept the configuration, it finally redirects to the Snowflake page.
With the proper support of your Azure Administrator, it has to go to the Storage Account and once in there enter into the Access Control (IAM) option.
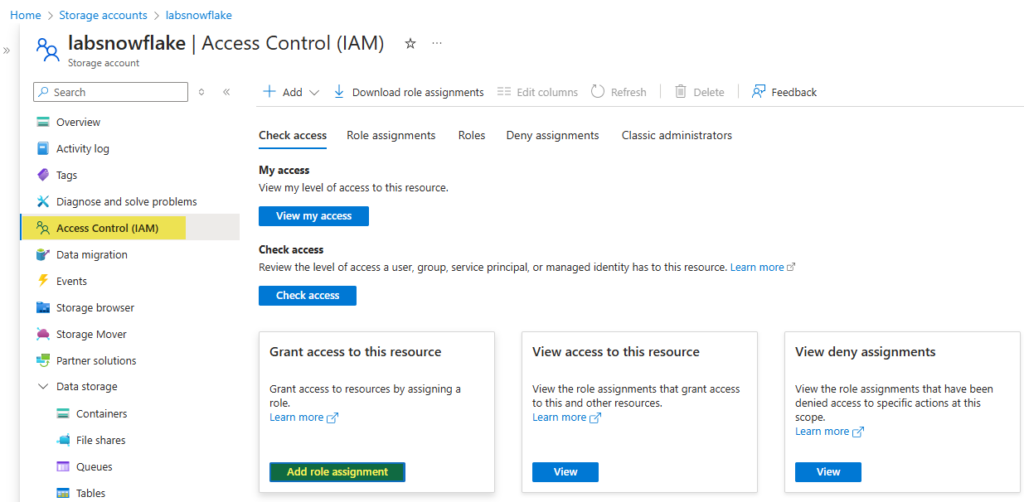
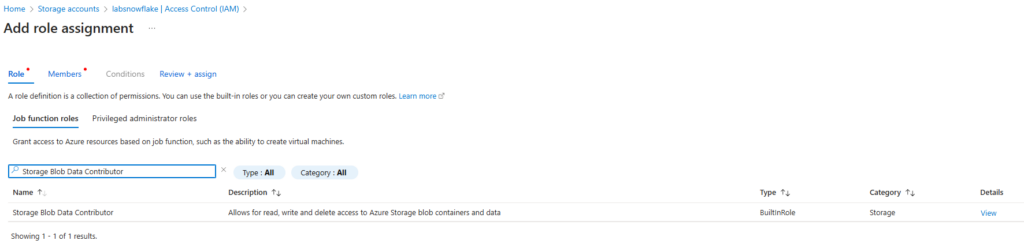
Click on the Add role assignment button and search for Storage Blob Data Contributor and add it.
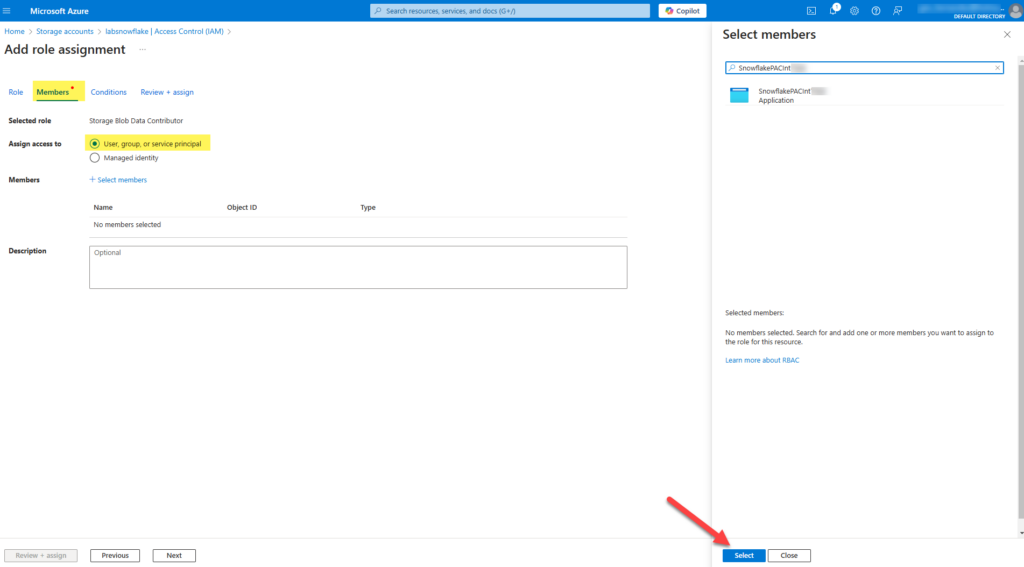
After making your selection, click Next. In the Members section, it’s essential to search for the AZURE_MULTI_TENANT_APP_NAME. This value corresponds to the identity specified in the AZURE_MULTI_TENANT_APP_NAME property from the DESC INTEGRATION output. You only need to capture the portion of the string from the beginning up to the first underscore (_). For example, if the value is SnowflakePACInt12345_9876543210123, you should extract only SnowflakePACInt12345, ignoring everything after the first underscore.
At this stage, we’re finalizing the storage integration process. The remaining steps involve defining the Stage and exploring its functionality.
Defining a Stage and exploring some other options
The process of defining a Stage consists of a simple command, but it is required that you use the Storage Integration defined previously. More information about the definition of Stage for Azure can be found in this article.
|
1 2 3 4 |
CREATE STAGE my_azure_blob_int STORAGE_INTEGRATION = <Puth the Integration name here> URL = <BLOB Storage URL> FILE_FORMAT = <File format name>; |
Here is the companion code for this article.
|
1 2 3 4 5 |
CREATE STAGE my_azure_stage STORAGE_INTEGRATION = my_azure_integration URL = 'azure://labsnowflake.blob.core.windows.net/dblab/' FILE_FORMAT = (TYPE = 'CSV' FIELD_OPTIONALLY_ENCLOSED_BY = '"') COPY_OPTIONS = (ON_ERROR = 'CONTINUE'); |
After the compilation, we could verify that Stage is already created with the following command
|
1 |
SHOW STAGES; |
It shows an output like this:

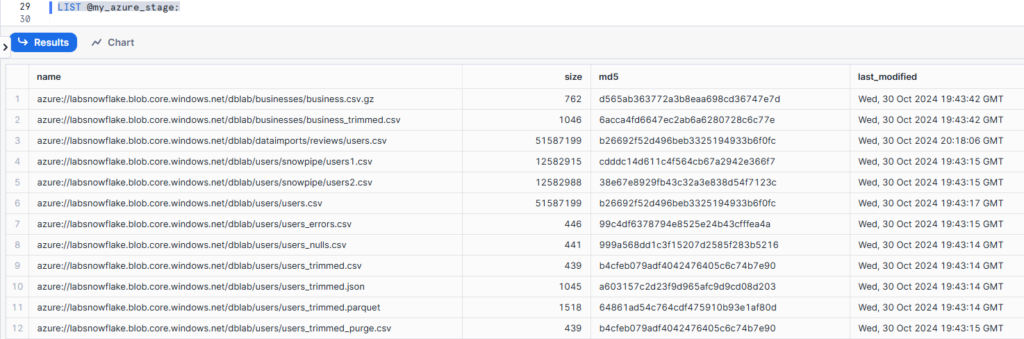
Finally, the acid test consists of listing all the files belonging to the Stage and its path defined, here is an example:
|
1 |
LIST @my_azure_stage; |
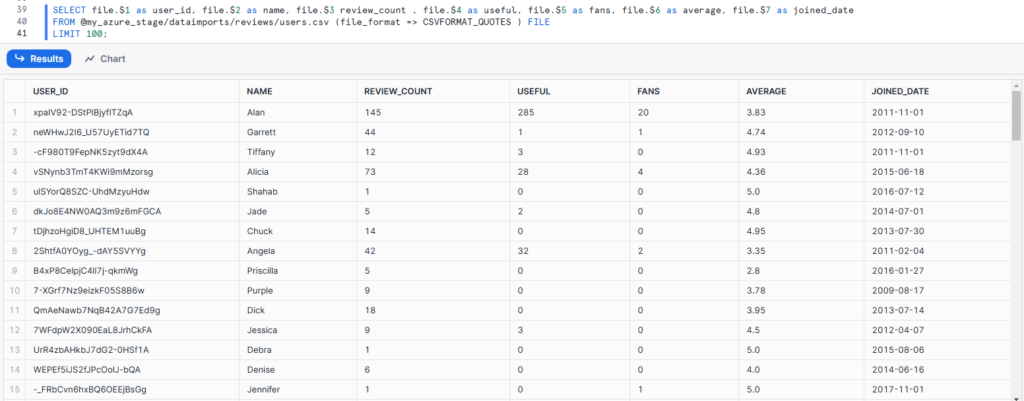
Now that we have access to the files corresponding to our Blob storage, we can play with them, in the following code we are going to create a file format and use it together with our Azure stage for reading a CSV file and showing the output in Snowflake.
|
1 2 3 4 5 |
CREATE OR REPLACE FILE FORMAT CSVFORMAT_QUOTES TYPE = 'CSV' FIELD_DELIMITER = ',' FIELD_OPTIONALLY_ENCLOSED_BY='"' SKIP_HEADER = 1 ; SELECT file.$1 as user_id, file.$2 as name, file.$3 review_count , file.$4 as useful, file.$5 as fans, file.$6 as average, file.$7 as joined_date FROM @my_azure_stage/dataimports/reviews/users.csv (file_format => CSVFORMAT_QUOTES ) FILE LIMIT 100; |
Conclusion
This article walked you through the steps to connect Azure Blob Storage with Snowflake using storage integration. You’ve learned how to set up permissions, create a stage, and securely transfer data without needing to manage credentials. With these steps, you can now handle data loading and unloading more easily across platforms. Stay tuned for more data engineering and data architecture tips in future posts!